Course Overview
🔐Notes
- Users can download the proxy file directly in the application or choose to download it manually from this link: https://3proxy.org/download/
- If the device or network does not support IPv6, the system will display an error.
- A profile can only be opened when there is at least one IPv6 address in Active status.
- If there is no Active IPv6, the system will display an error message.
- Not applicable for Common and Trial packages.
- Only available on app versions above 4.2.0.
- Works only on devices and networks that support IPv6.
- Allows creating up to 500 Active IPv6 addresses.
- When the app is closed, the IPv6 proxy will become Inactive, and a new one must be created for further use.
- Multiple IPv6 addresses can be used to log into multiple accounts on the same device, provided that the accounts meet the requirements (version, package).
- IP Status:
✅ Active: The IPv6 is active and can be used to create profiles.
🚫 Inactive: The IPv6 has been disabled and cannot be used. - When the package expires, previously created IPv6 addresses can still be used, but new ones cannot be created.
🌟 Features
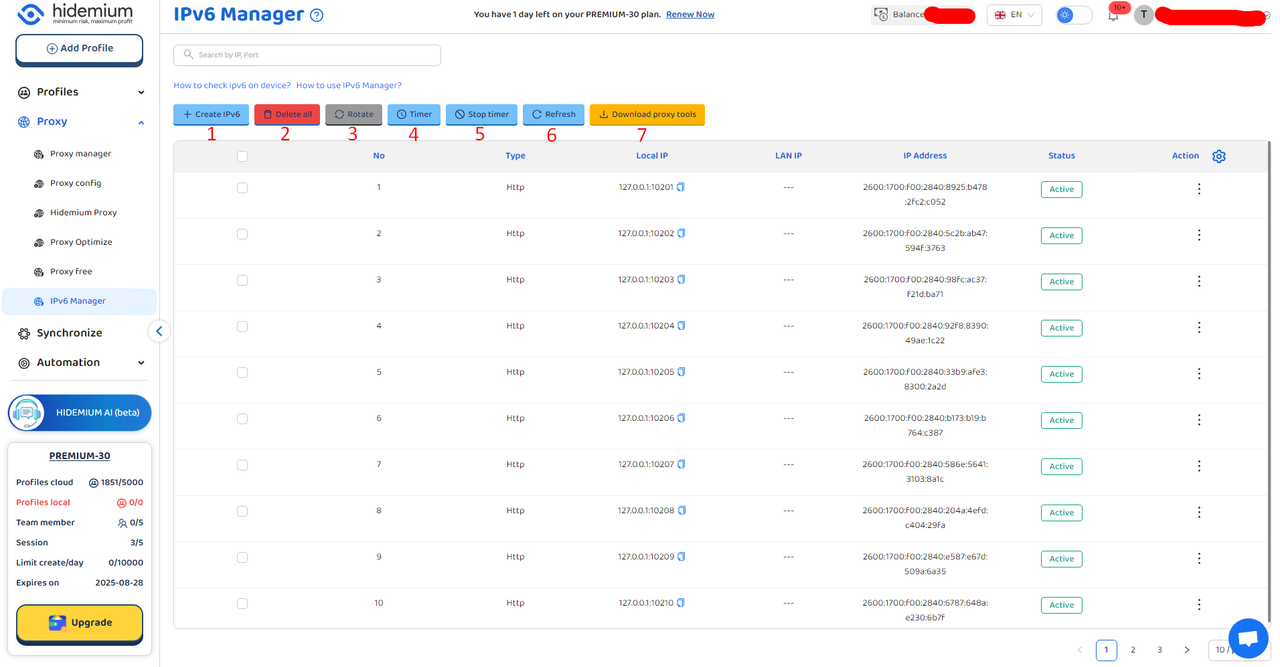
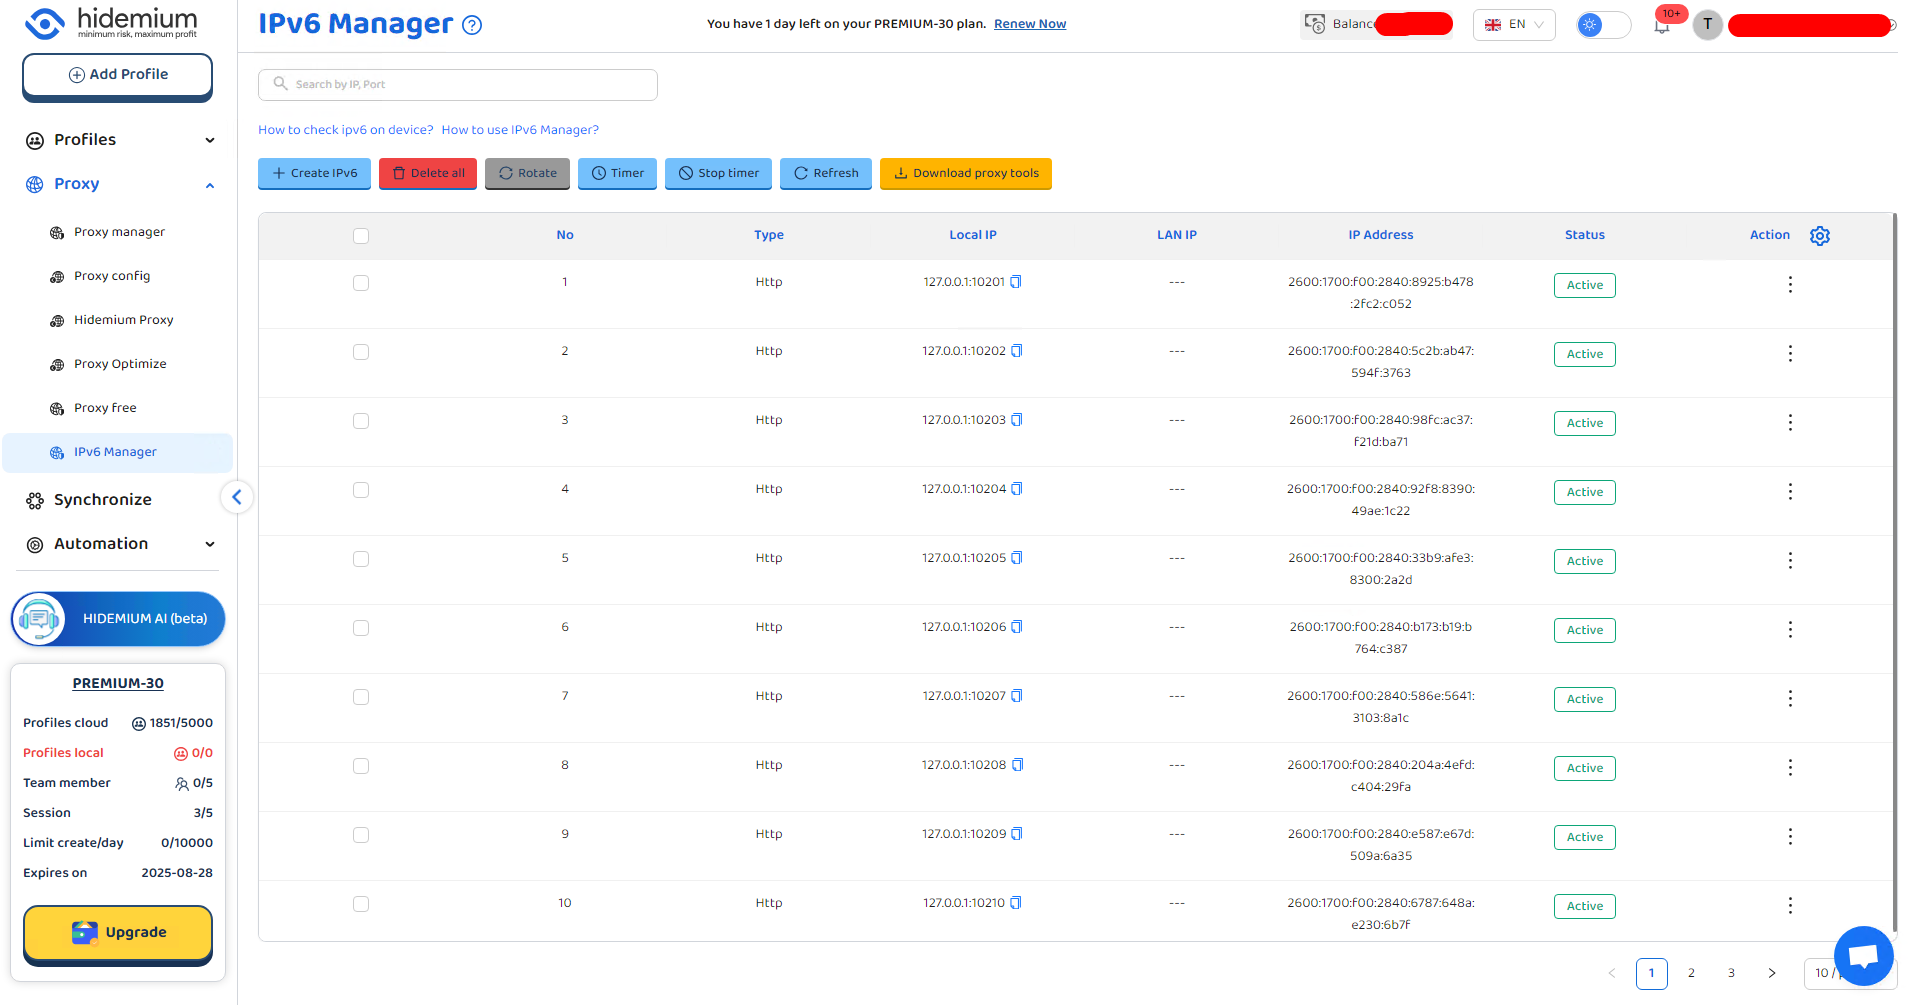
In the IPv6 Manager interface, users have the following function buttons:
- Function: Create a new IPv6 address
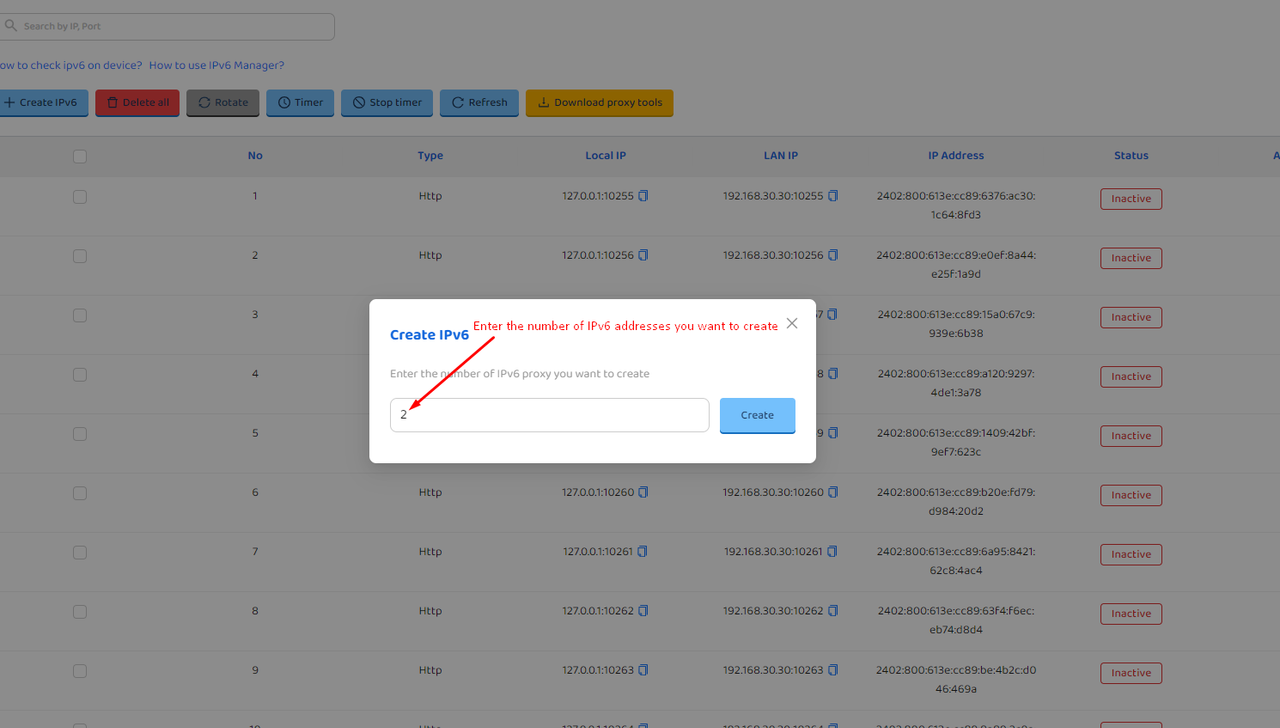
- Users can select the number of IPv6 addresses to create (up to 500 at a time)
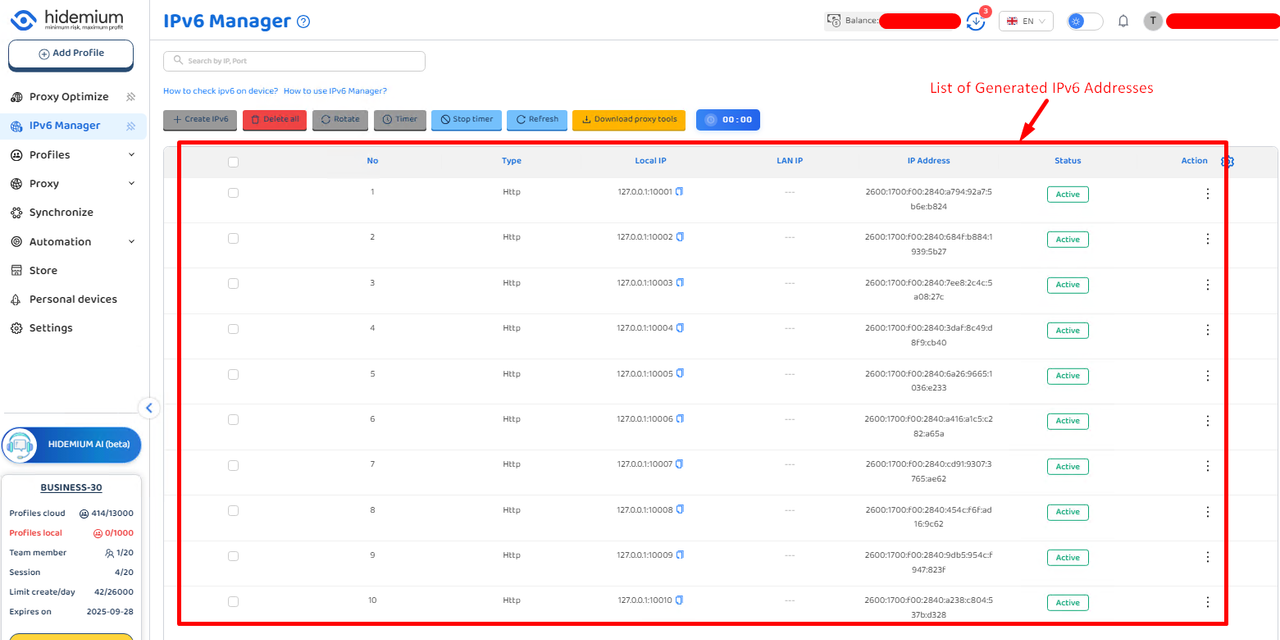
- After creation, the addresses will be displayed in the list along with their details
- Function: Delete the selected IPv6 address from the list
- Note: Once deleted, the IPv6 address will be permanently removed from the device and cannot be
- Function: Change the selected IP address
- When clicked, the system generates a new IP address to replace the current one, allowing users to refresh when running profiles
- Function: Set a timer to automatically rotate the IP address. If you do not want it to rotate, you must stop the timer
- Users can enter a custom number of minutes (e.g., 5 minutes, 10 minutes, 30 minutes)
- When the set time is reached, the system will automatically rotate the IP address
- Function: Stop the timer for IP address rotation
- Use this when you no longer want the system to automatically rotate the IP address and prefer to keep the current IP address
- Function: Refresh (reload) the IPv6 list displayed on the screen
Helps update the latest status of the IP addresses
7. Download proxy tools
- When using this function, users can download the proxy file directly in the application via the Download Proxy Tools button.
🗑️ IPv6 Management
- When an IPv6 is deleted, the address will be permanently removed from the device and cannot be restored.
🛠️ Steps to Create a New IPv6
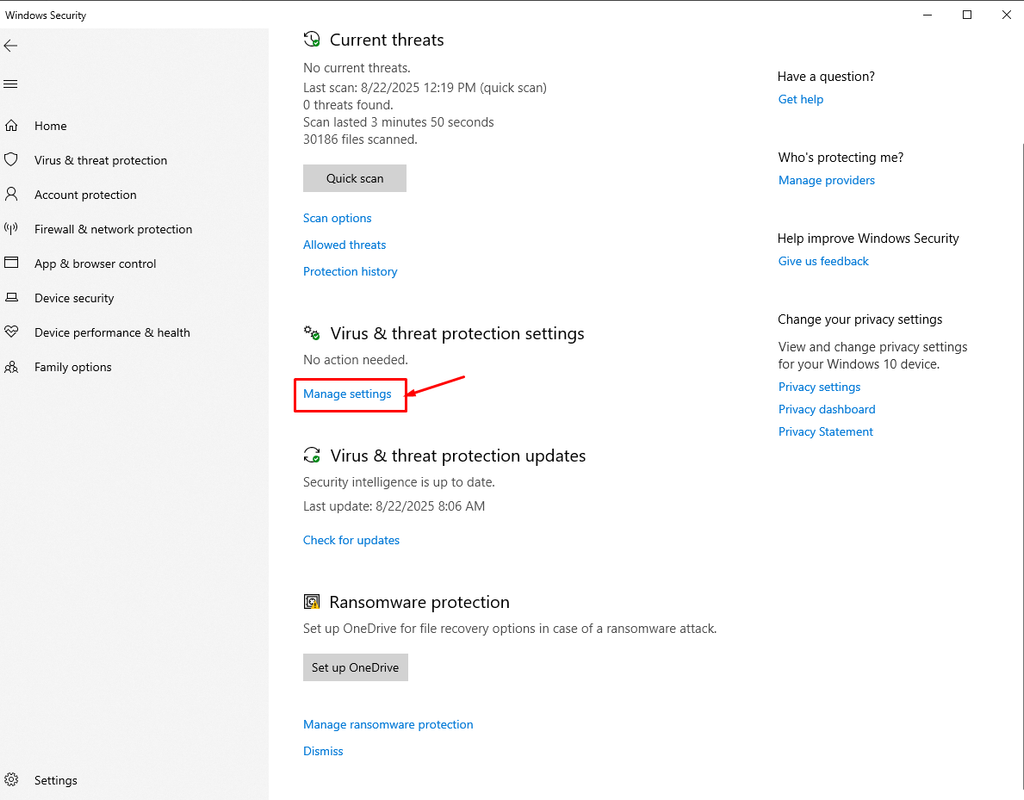
Step 1: Before creating a new IPv6, go to Virus & Threat Protection Settings → select Manage Settings
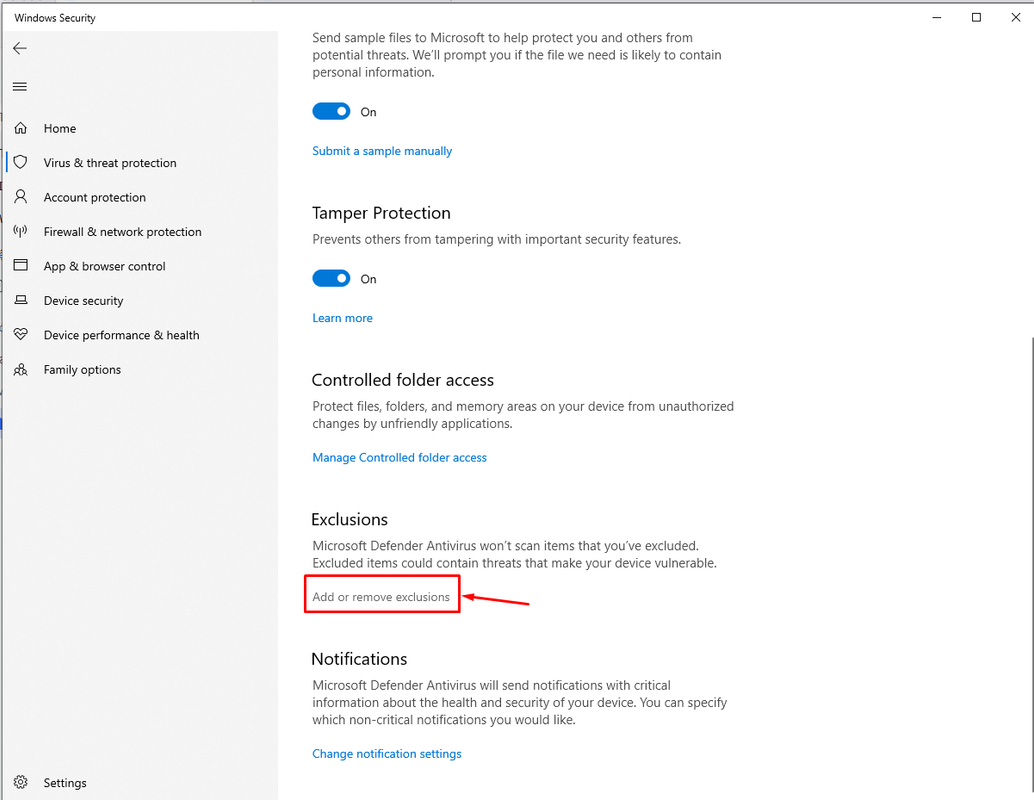
Step 2: Select add or remove exclusions
Step 3: Select add an exclusions -> Select folder
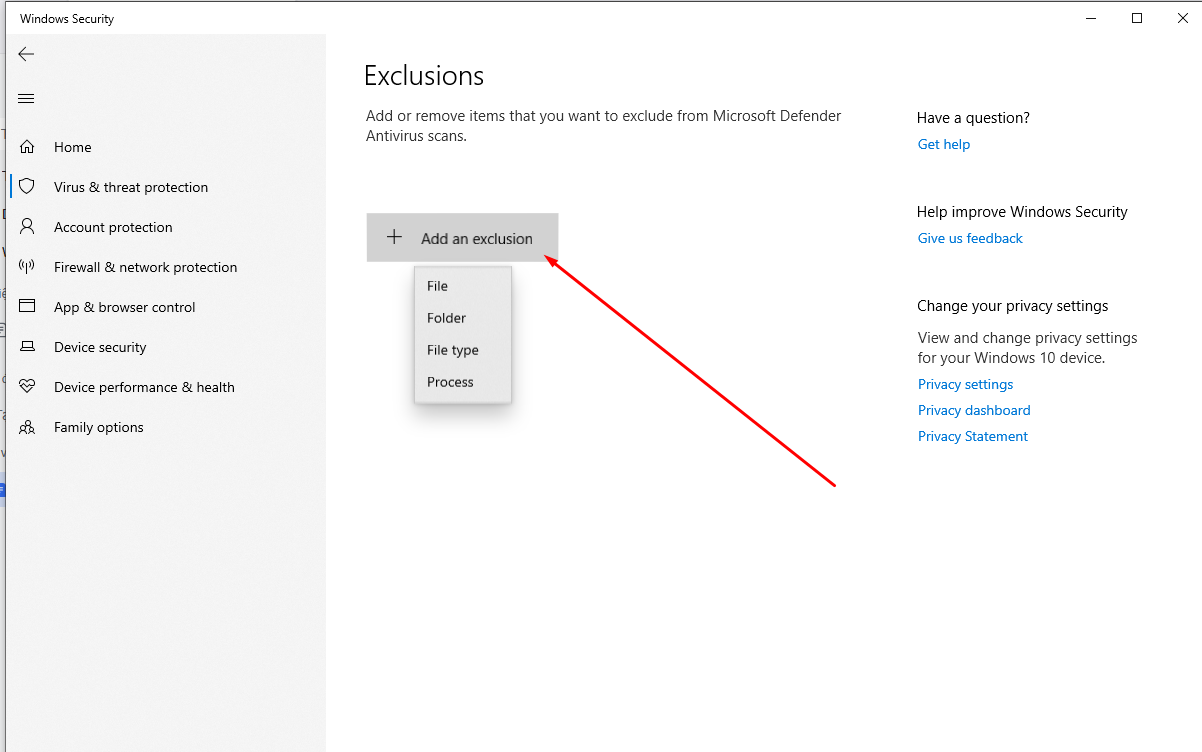
Step 4: Select Path folder eg: C:Users{name_PC}.hidemium_4
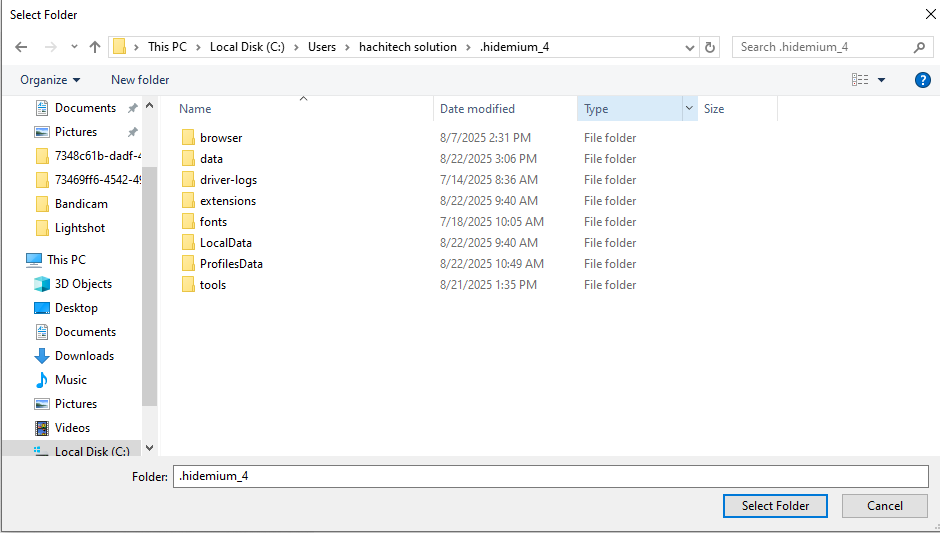
Step 5: Install the file to create the IPv6 proxy.
Method 1: Users can download the proxy file directly in the application.
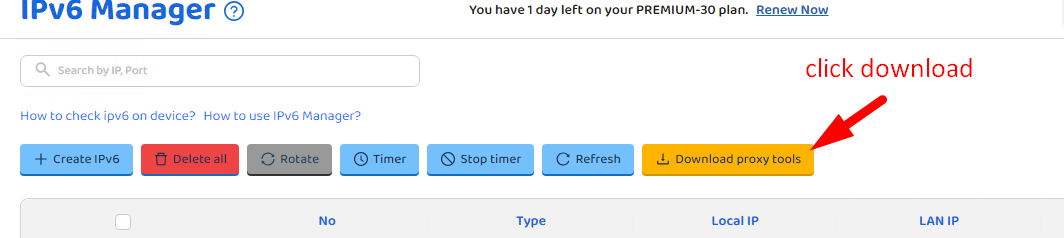
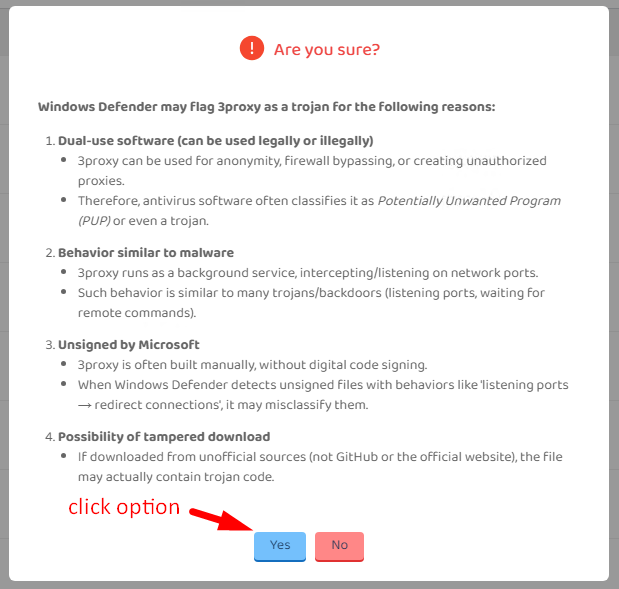
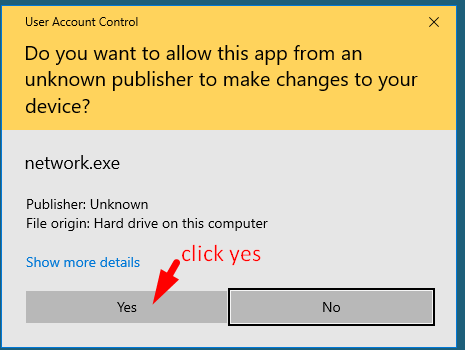
Method 2: How to manually download the proxy file
1: Manually download the proxy file from this link: https://github.com/z3APA3A/3proxy-archive/tree/master/0.9.0-rc
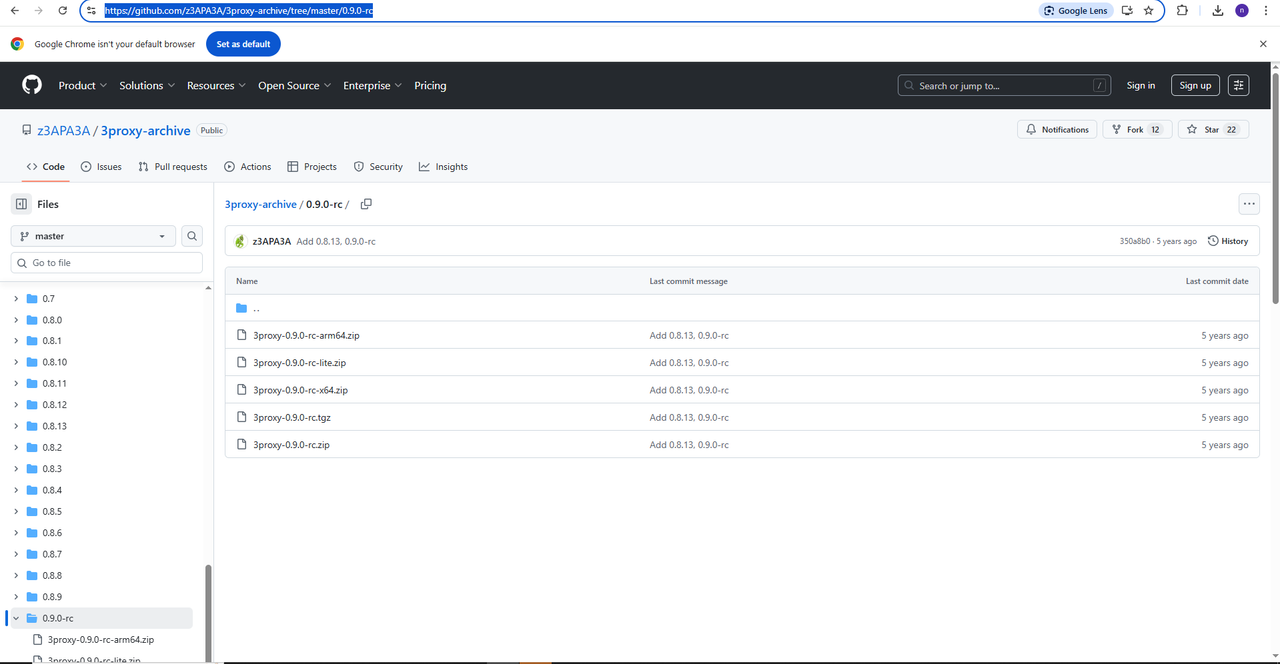
2: Select the appropriate version and download it.
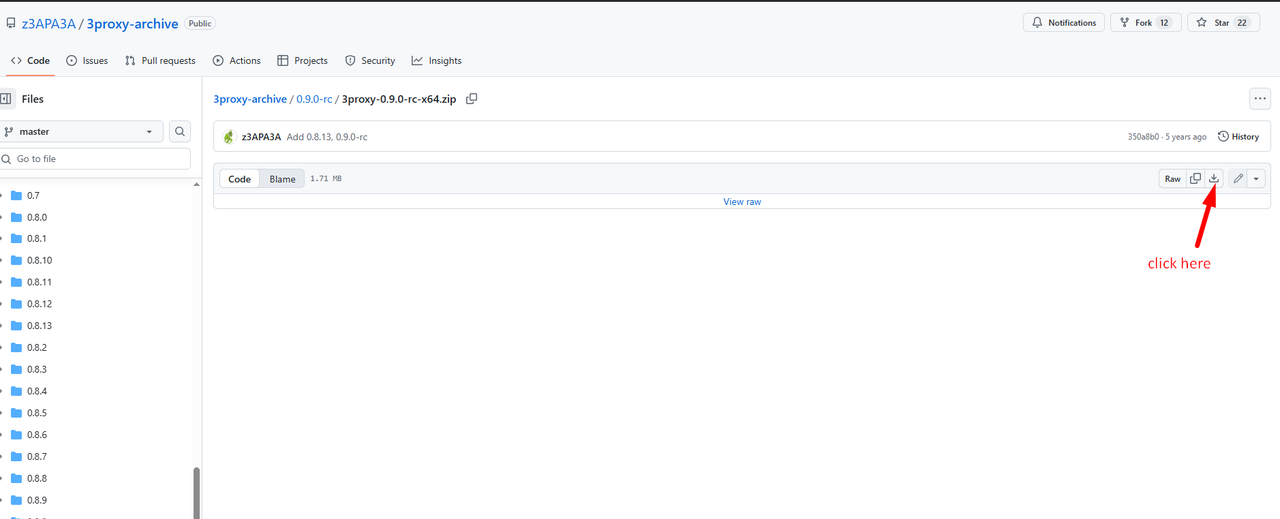
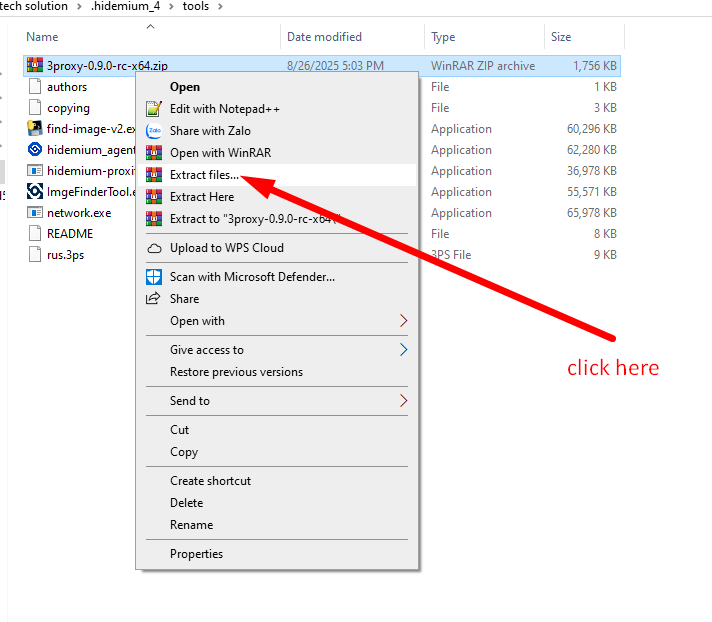
3. Extract the file.
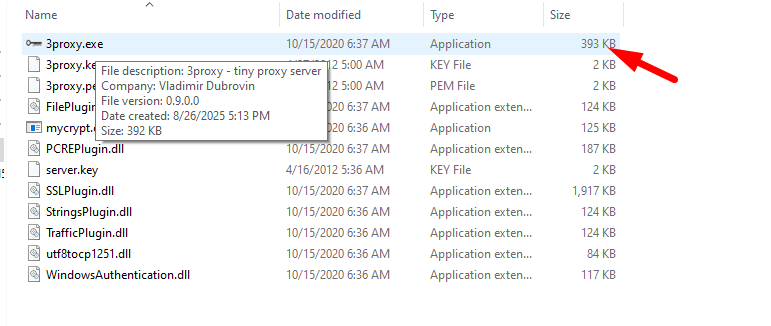
4. Select file bin64

5. Copy this file into the tools folder for the version 4.2.0 (C:Users{name_PC}.hidemium_4tools) From version 4.2.1 and above, it will be saved in the folder toolsproxy of Hidemium and open the app (C:Users{name_PC}.hidemium_4toolsproxy)
6. Download the network.exe file from the link: https://drive.google.com/file/d/1wmBUaCJSqJtcDW5kp_a7znTwHgTGLgvc/view?usp=drive_Save the file into the tools folder for the version 4.2.0 (C:Users{name_PC}.hidemium_4tools) From version 4.2.1 and above, it will be saved in the toolsproxy folder of Hidemium, then open the app (C:Users{name_PC}.hidemium_4toolsproxy)

Step 6: Open the app → go to the screen IP V6 Manager -> create IPv6
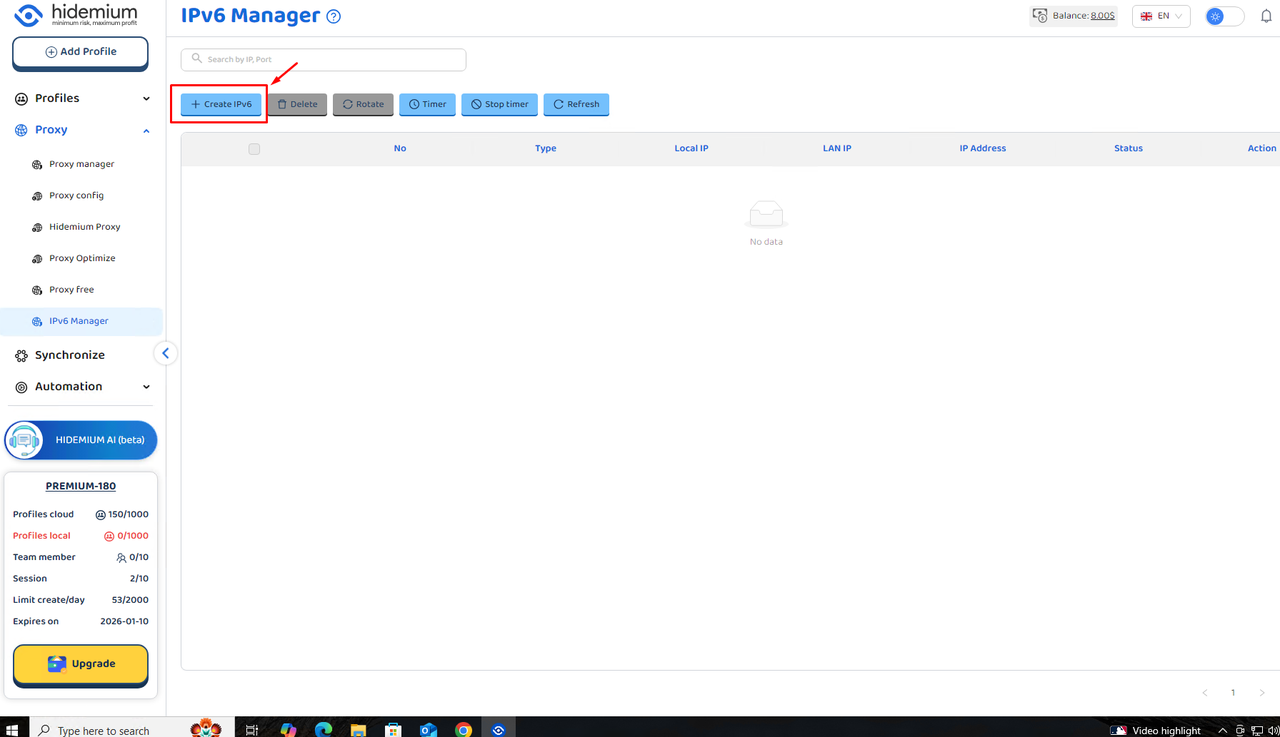
Step 7: Enter the number of IPs you want to create → select Create.
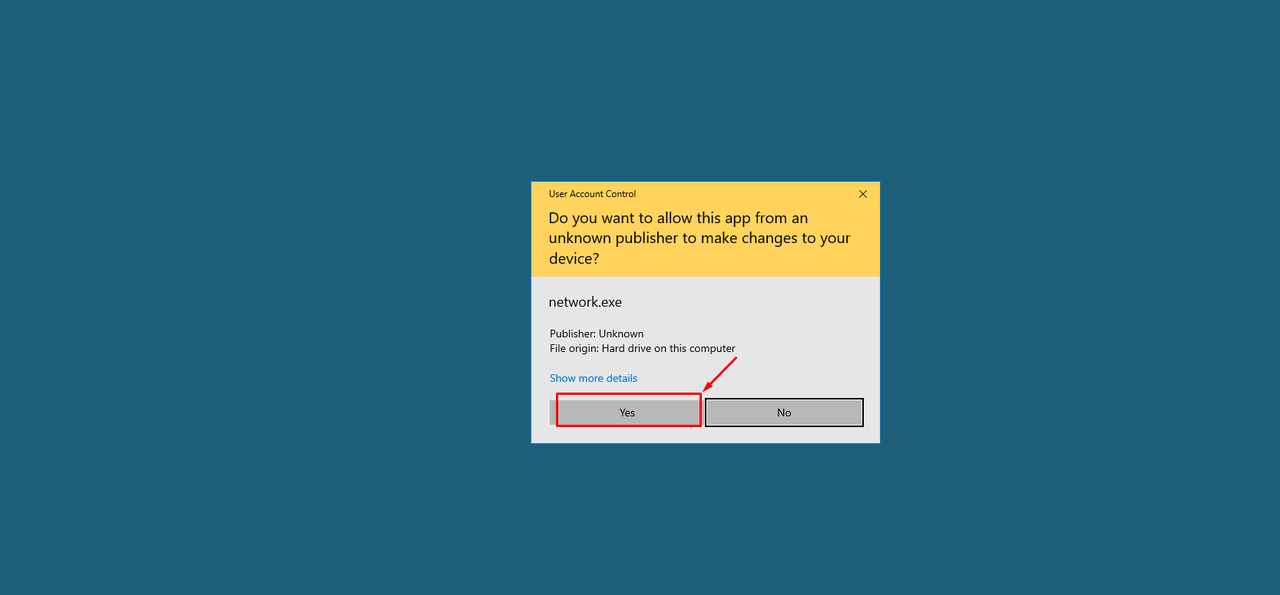
Step 8: Select yes.
Step 9: Display the list and manage IPs on this screen.
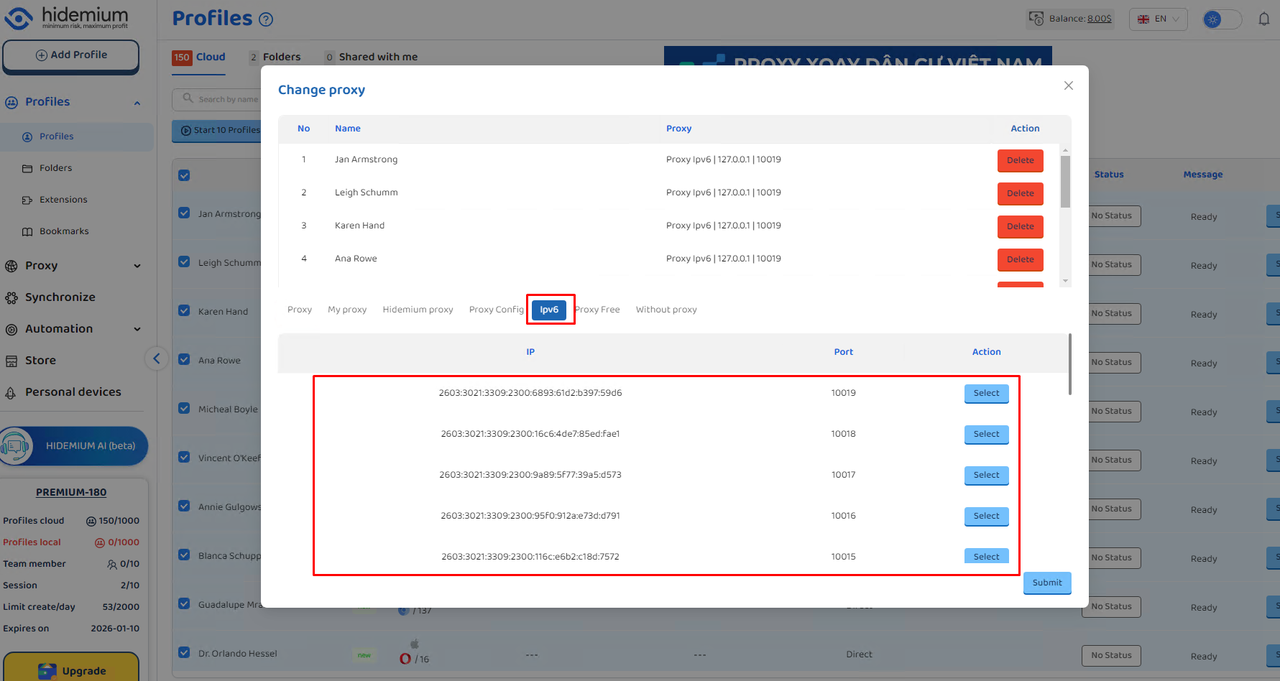
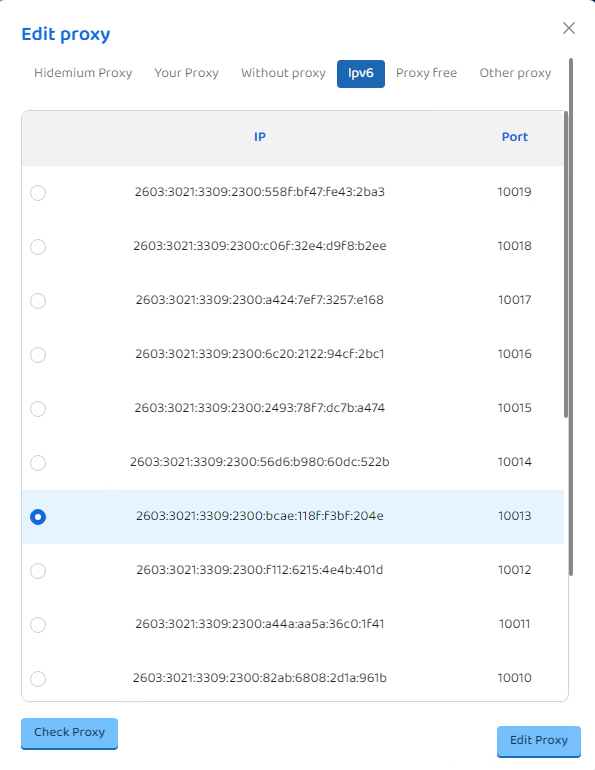
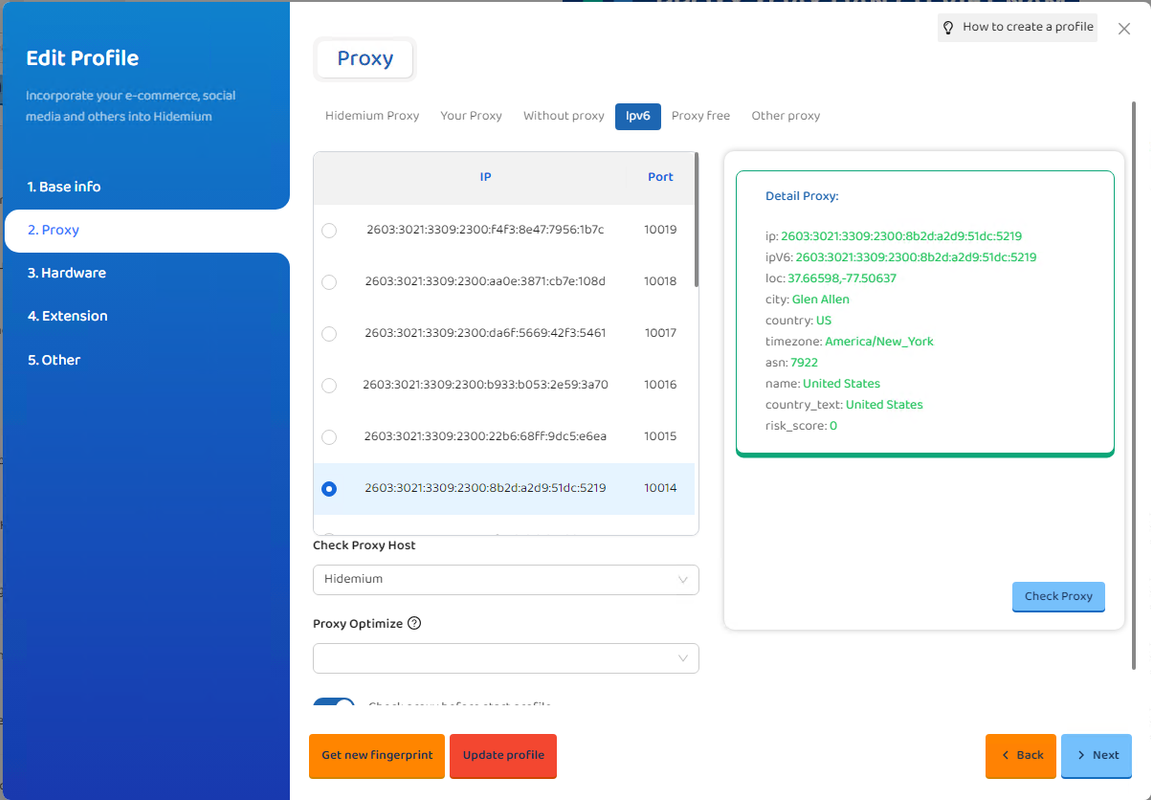
Step 10: Screens using IPv6 with profiles.